This article will guide you on creating redirects on Amazon S3 for a website with a custom domain registered with Amazon Route 53. The following services will be used: Amazon Route 53 for domain registration and routing internet traffic, Amazon S3 for bucket creation, uploading a redirection script, configuring permissions for public access, and configuring the buckets for website hosting.
In this example, we will redirect a custom domain registered with Amazon Route 53 instead of using this lengthy URL. – https://aws.amazon.com/developer/community/community-builders/community-builders-directory/?cb-cards.sort-by=item.additionalFields.cbName&cb-cards.sort-order=asc&awsf.builder-category=*all&awsf.location=*all&awsf.year=*all&cb-cards.q=Nestor%2BMayagma%2BJr.&cb-cards.q_operator=AND.
STEPS:
Step 1: Go to Amazon S3 → Buckets → Create bucket
Follow these configurations:


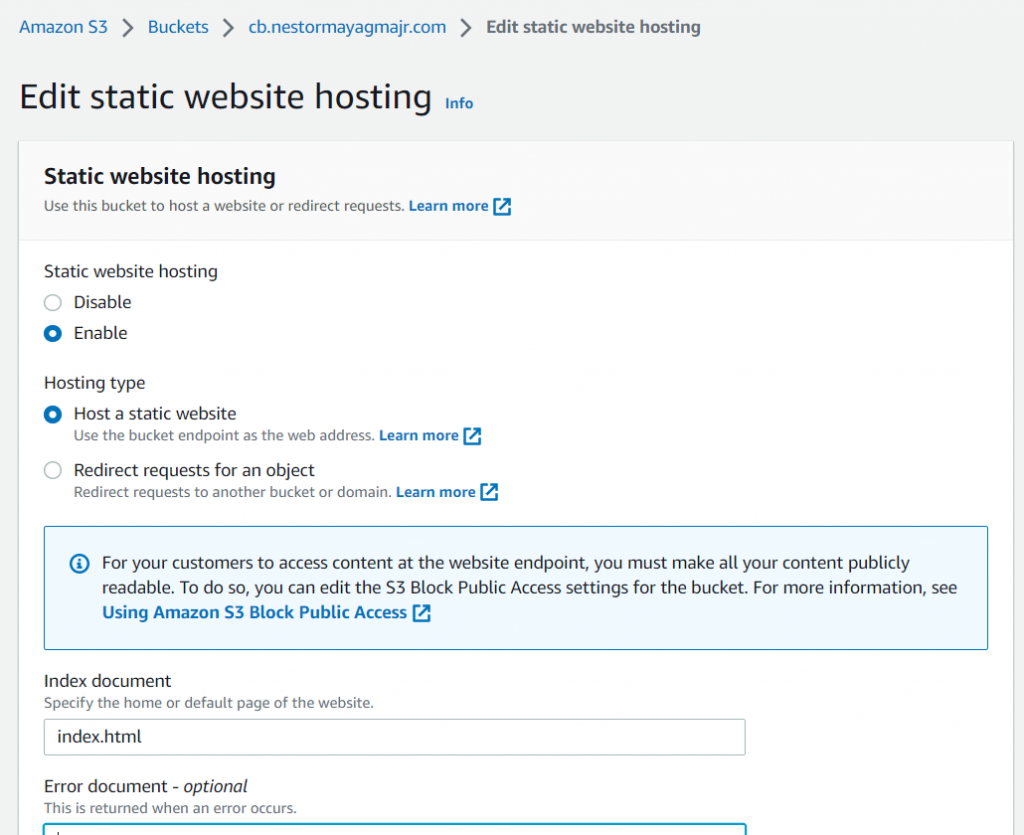
Step 2: Go to Properties → Static website hosting → Edit → Enable → Save Changes
Follow this configuration:

Step 3: Copy the Bucket website endpoint. We’ll be using it later in Route53.

Step 4: Go to the Permissions tab → Bucket policy → Edit.

Paste this policy:
{
"Version": "2012-10-17",
"Statement": [
{
"Effect": "Allow",
"Principal": "*",
"Action": "s3:GetObject",
"Resource": "arn:aws:s3:::cb.nestormayagmajr.com/index.html"
}
]
}
Save Changes.
Step 5: Create an HTML file that contains a redirection script.
<!DOCTYPE html>
<html>
<head>
  <meta http-equiv="refresh" content="0; url=https://aws.amazon.com/developer/community/community-builders/community-builders-directory/?cb-cards.sort-by=item.additionalFields.cbName&cb-cards.sort-order=asc&awsf.builder-category=*all&awsf.location=*all&awsf.year=*all&cb-cards.q=Nestor%2BMayagma%2BJr.&cb-cards.q_operator=AND">
</head>
<body>
</body>
</html>
Replace the current URL with the URL you wish to redirect to.
In this example, we’re using the http-equiv attribute with a “refresh” directive in a <meta> tag to redirect to the AWS Community Builder Directory, where my name is listed.
Step 6: Save the file and name it index.html.
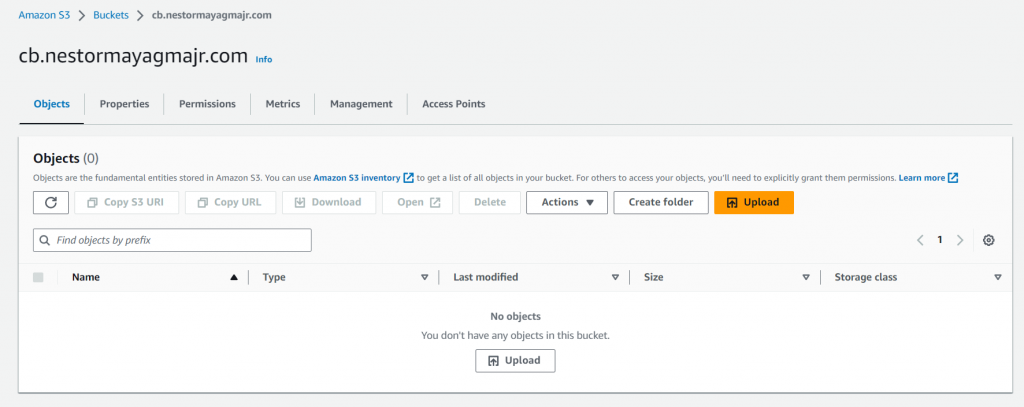
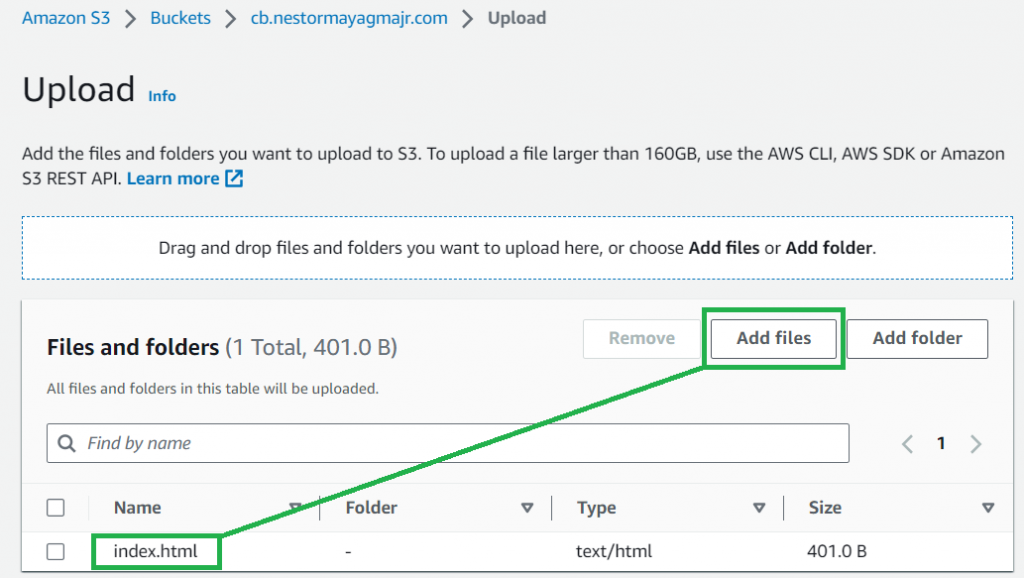
Step 7: Upload the index.html file in Amazon S3

Add files → Upload the created HTML file:

Click Upload.
Step 8: Go to Route53 → Hosted Zones → Your domain → Create record
Follow this configuration:

That’s it! Using cb.nestormayagmajr.com will now redirect to this very lengthy URL – https://aws.amazon.com/developer/community/community-builders/community-builders-directory/?cb-cards.sort-by=item.additionalFields.cbName&cb-cards.sort-order=asc&awsf.builder-category=*all&awsf.location=*all&awsf.year=*all&cb-cards.q=Nestor%2BMayagma%2BJr.&cb-cards.q_operator=AND
